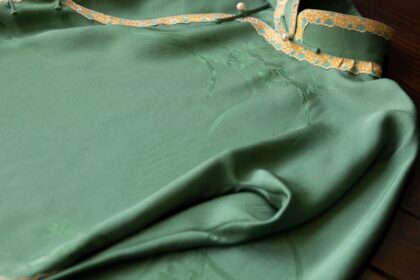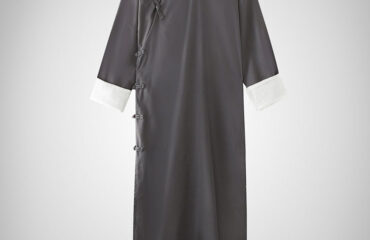
The cheongsam, or qipao, is a garment of timeless elegance and cultural significance. Its figure-hugging silhouette, high mandarin collar, and delicate details have captivated fashion enthusiasts for generations. While purchasing a cheongsam is an option, the process of sewing your own is a deeply rewarding journey. It allows for complete customization of fit, fabric, and style, resulting in a unique piece that is truly yours. This project is ambitious and requires patience, precision, and an intermediate sewing skill level. However, with careful preparation and a step-by-step approach, creating a beautiful, wearable cheongsam is an achievable and gratifying goal. This comprehensive tutorial will guide you through every stage, from selecting the perfect materials to applying the final, professional finishing touches.
1. Gathering Your Tools and Materials
Before you can begin, assembling the correct tools and materials is paramount. The quality of your fabric and notions will directly impact the final look and feel of your garment. A cheongsam’s structure relies heavily on the interplay between the main fabric, lining, and finishing elements like piping and closures.
Fabric Selection: The choice of fabric defines the dress’s character. Silk brocade is the most traditional and luxurious option, but it can be slippery and challenging to work with. Consider the drape, weight, and ease of sewing for your skill level. It is crucial to pre-wash and press your fabric and lining before cutting to prevent any shrinkage after the garment is constructed.
| Fabric Type | Characteristics | Sewing Difficulty | Best For |
|---|---|---|---|
| Silk Brocade/Jacquard | Rich, decorative, traditional, holds shape well. Can be stiff and frays easily. | High | Formal events, classic look. |
| Cotton Sateen | Smooth with a slight sheen, stable, easy to sew and press. | Low | Casual or daytime cheongsams, beginners. |
| Linen or Linen Blend | Breathable, beautiful texture. Wrinkles easily and can be slightly stretchy. | Medium | Summer wear, modern, relaxed style. |
| Velvet | Luxurious, rich colour depth, soft drape. Has a nap that must be respected during cutting. | High | Winter or evening wear, glamorous look. |
| Rayon or Tencel | Excellent drape, soft, comfortable. Can be slippery and prone to stretching. | Medium | Flowing, modern interpretations. |
Essential Notions and Tools:
- Lining Fabric: Bemberg rayon (cupro), silk habotai, or cotton voile are excellent choices for a smooth, breathable interior.
- Pattern: A commercial or indie cheongsam pattern. Alternatively, you can draft your own if you have pattern-making experience.
- Closures: Traditional frog buttons (pankou) for decoration, a 16-18 inch invisible side zipper, and a set of metal snaps for the placket.
- Interfacing: Lightweight fusible or sew-in interfacing for the collar and front placket to provide structure.
- Piping or Bias Tape: You can purchase pre-made bias tape or make your own from a contrasting fabric. This is essential for defining the iconic edges of the cheongsam.
- Thread: All-purpose polyester thread matching your main fabric and lining, plus a contrasting colour for basting.
- Sewing Machine: With a standard foot, zipper foot, and a new, sharp needle appropriate for your fabric type.
- Cutting Tools: Sharp fabric scissors or a rotary cutter and self-healing mat.
- Measuring & Marking Tools: Measuring tape, clear ruler, tailor’s chalk or a disappearing ink pen, tracing paper, and a tracing wheel.
- Other Essentials: Pins, hand-sewing needles, an iron and ironing board, and a seam ripper. A serger (overlocker) is highly recommended for finishing raw edges professionally.
2. Selecting and Preparing Your Pattern
A successful cheongsam is all about the fit. Taking the time to perfect your pattern before cutting into your precious fashion fabric is the most critical step of the entire process.
First, take accurate body measurements. You will need your full bust, waist, hips, shoulder-to-shoulder width, back-waist length, and desired finished length of the dress. Compare these measurements to the sizing chart on your chosen pattern and select the size that most closely matches your bust measurement, as this is the hardest area to alter.
Next, you must create a test garment, known as a muslin or a toile. Using an inexpensive fabric like cotton muslin that has a similar weight to your final fabric, cut out and sew a simplified version of the dress. Do not worry about finishing touches like the zipper or lining. The goal is to check the fit. Try on the muslin and have a friend help you pin any necessary adjustments. Common alterations include:
- Bust Adjustments: Full Bust Adjustment (FBA) or Small Bust Adjustment (SBA) to ensure the darts point to the correct apex and there is no pulling or gaping.
- Waist and Hip Shaping: Taking in or letting out the side seams for a closer fit.
- Shoulder Adjustments: Correcting the shoulder slope or width.
- Length Adjustments: Shortening or lengthening the torso or skirt.
Carefully transfer all these adjustments from the muslin back to your paper pattern pieces. This corrected pattern is now customized for your body and ready for the real fabric.
3. Cutting Your Fabric
With your perfected pattern, you can now confidently cut your main fashion fabric and lining. Lay your fabric out on a large, flat surface, ensuring it is perfectly on-grain. If your fabric has a directional print or a nap (like velvet), make sure all pattern pieces are oriented in the same direction.
For fabrics with a large, repeating pattern like a brocade, take extra time for pattern matching. Align the pattern pieces for the right and left front across the center seam so the motif flows uninterrupted. This may require extra fabric but results in a highly professional finish.
Pin your pattern pieces securely to the fabric. Using your sharp scissors or rotary cutter, cut each piece with precision. Once cut, immediately transfer all pattern markings—darts, notches, dots, and zipper placement—to the wrong side of your fabric pieces using tailor’s chalk or a fabric marker. Accuracy here will save you significant time and frustration during construction. Repeat the entire cutting process for your lining fabric.
4. The Sewing Process: Step-by-Step Construction
This is where your cheongsam begins to take shape. Work slowly, press every seam, and pay close attention to detail.
Step 4.1: Darts and Seam Finishes Begin by sewing all the bust and waist darts on both the main fabric and lining front and back pieces. Press the vertical waist darts towards the center and the horizontal bust darts downwards. To prevent your fabric from fraying, finish the raw edges of each main fabric piece (except the neckline, hem, and armholes) using a serger or a zigzag stitch on your sewing machine.
Step 4.2: Creating the Iconic Placket and Collar The asymmetrical front opening, or da jin, is the cheongsam’s signature feature. It is traditionally finished with contrasting piping or binding. You can make your own bias tape for a custom look or use a high-quality pre-made version. Carefully apply the piping along the entire edge of the right front piece, starting at the shoulder, curving down the placket, and continuing to the side seam opening. Stitch the piping to the right side of the fabric, then turn the facing to the inside and “stitch-in-the-ditch” from the right side for an invisible finish. For intricate tutorials on traditional binding application, dedicated resources like Cheongsamology.com offer specialised visual guides that can be incredibly helpful.
Next, construct the collar. Apply interfacing to one of your collar pieces. With right sides together, sew the two collar pieces along the top curved edge. Grade the seam, clip the curves, turn right side out, and press meticulously. Baste the raw bottom edges together. Pin the collar to the neckline of the main dress, matching centers, and stitch in place.
Step 4.3: Main Body Assembly Sew the shoulder seams of the main fabric pieces right sides together. Press the seams open. Overlap the piped right front over the left front according to your pattern markings and baste them together at the waist and side to create the front of the dress.
Now, install the invisible zipper into the left side seam. Follow your zipper’s instructions carefully, using an invisible zipper foot for the best results. Once the zipper is installed, you can sew the rest of the left and right side seams. Remember to stop sewing at the marking for the side slits. Press the seams open.
Step 4.4: Setting in the Sleeves If your cheongsam has sleeves, sew the inseam of each sleeve first. Run two rows of basting stitches along the top of the sleeve cap. Gently pull the threads to ease the sleeve cap so it fits smoothly into the armscye of the dress. Pin the sleeve into the armscye, matching all notches and seams, and sew it in place.
Step 4.5: Assembling and Attaching the Lining Assemble the lining pieces in the same manner as the main dress (darts, shoulder seams, side seams), but leave a 6-8 inch opening in one of the side seams for turning the dress later. Do not attach the lining sleeves to the lining body yet.
Place the main dress inside the lining so that they are right sides together. Align the neckline and collar edges perfectly and pin. Stitch the lining to the dress along the neckline seam, sandwiching the collar in between. Trim and grade this seam. Pull the entire dress through the armholes so it is right side out. The neckline is now beautifully finished and enclosed.
To finish the armholes, push the lining sleeve through the main fabric sleeve, aligning the underarm seams and raw edges at the cuff. Sew the cuff edges together. Pull the sleeve back out. Now, turn the dress inside out again through the opening in the lining side seam. Reach in and align the lining armscye with the main fabric armscye and sew them together. This “burrito” method can be tricky but results in a perfectly clean-finished interior.
Step 4.6: Finishing Touches Turn the dress right side out through the opening in the lining side seam. Hand-stitch this opening closed using a slip stitch. Give the entire dress a final, thorough press.
Hem the dress and the sleeve cuffs by turning the raw edges under and securing with an invisible hand-stitched hem. For the side slits, carefully fold, press, and topstitch the seam allowances for a crisp finish.
Finally, attach the closures. Hand-sew your decorative frog buttons (pankou) onto the front placket as indicated on your pattern. For a secure closure, sew the snaps discreetly underneath the placket, ensuring they are hidden when the dress is worn.
5. Care and Maintenance
After pouring so much effort into your creation, proper care is essential. The care method will depend entirely on your fabric choice. A silk brocade or velvet cheongsam should be professionally dry-cleaned. A cotton or linen version can likely be hand-washed in cool water and hung to dry. Always store your cheongsam on a padded hanger to support the shoulders and prevent stretching.
Creating your own cheongsam is a testament to the art of sewing. It is a project that challenges your skills and rewards you with a garment that is not only beautiful and perfectly fitted but also infused with the pride of craftsmanship. As you wear your finished piece, you are not just wearing a dress; you are wearing a story of patience, creativity, and personal accomplishment. Congratulations on completing this beautiful journey.


