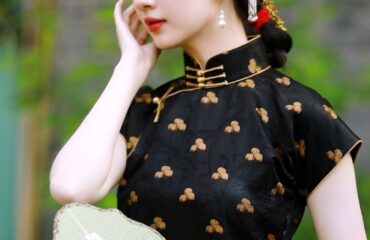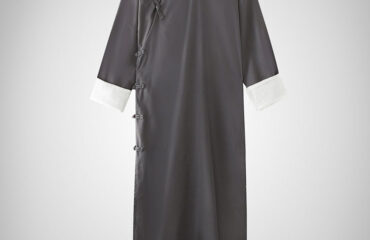
The Japanese kimono is an icon of grace, tradition, and intricate artistry. A single glance at its elegant silhouette and beautiful fabric evokes a sense of history and cultural depth. While crafting a formal, multi-layered silk kimono is a skill honed by artisans over a lifetime, creating a simplified, yet authentic-looking, kimono-style robe is an accessible and deeply rewarding project for the home sewist. This robe, often similar in structure to a casual yukata, can serve as luxurious loungewear, a stylish beach cover-up, or a unique light jacket. This comprehensive guide will walk you through every step of the process, from understanding the garment’s construction to the final, satisfying stitch, empowering you to create a beautiful piece of wearable art.
1. Understanding the Kimono’s Anatomy and Choosing Your Style
Before cutting into your fabric, it’s essential to understand the basic structure of a kimono. Unlike Western garments that rely on curves and darts, the kimono is constructed from a series of straight, rectangular panels. This geometric simplicity is key to its unique drape and form. The main components you will be creating are the Migoro (main body panels), Sode (sleeves), Okumi (front overlap panels), and Eri (collar).
The project in this guide simplifies the traditional process to make it achievable for a beginner. The primary differences lie in the fabric choice, lining, and construction complexity. The following table illustrates how our DIY robe compares to more traditional forms.
| Feature | Formal Kimono (e.g., Furisode) | Yukata (Casual Cotton Kimono) | DIY Kimono Robe (This Guide) |
|---|---|---|---|
| Fabric | Silk, brocade, crepe silk | Cotton, hemp | Cotton, linen, rayon, lightweight silk |
| Lining | Fully lined (often with contrasting fabric) | Unlined | Unlined (for simplicity) |
| Construction | Complex, hand-stitched, multiple layers | Simpler, often machine-stitched | Simplified for home sewing machines |
| Sleeves | Very long, specific shapes depending on formality | Standard rectangular length | Customizable length |
| Accessories | Nagajuban (under-kimono), obi, obijime, etc. | Simple obi or sash | Simple, self-fabricated sash |
| Occasion | Formal events, weddings, ceremonies | Summer festivals, as a bath robe or house robe | Loungewear, casual outerwear, cover-up |
2. Gathering Your Materials and Tools
Selecting the right materials is the first creative step. Your choice of fabric will define the robe’s character and drape. For a successful project, you will need the following:
Fabric:
- Type: Choose a fabric that is easy to sew and has a good drape. Excellent choices include cotton lawn, cotton poplin, rayon challis, linen or linen-blends, and double gauze. For a more luxurious feel, you could use a silk crepe de chine or satin, but be aware these are more challenging to handle.
- Quantity: Traditionally, a kimono is made from a single bolt of fabric called a tanmono, which is approximately 36 cm (14 inches) wide and 12 meters (13 yards) long. Since modern fabrics are much wider (typically 115 cm/45 in or 150 cm/60 in), you will need less length. For an average-sized adult, 3.5 to 4.5 meters (4 to 5 yards) of 115 cm (45 in) wide fabric is a safe estimate. It is always better to have slightly more than not enough.
Tools & Notions:
- Sewing machine with a universal needle
- Matching all-purpose thread
- Fabric scissors or a rotary cutter and mat
- Measuring tape
- Fabric marker, chalk, or water-soluble pen
- Straight pins or sewing clips
- Iron and ironing board (essential for crisp seams)
- Pattern paper (optional, as you can draft directly onto the fabric)
- Hand sewing needle (for finishing touches)
3. Taking Your Measurements and Drafting the Pattern
The beauty of a kimono pattern is that it is adapted from your own measurements. Forget standard sizing; this garment will be tailored perfectly for you. Take the following key measurements:
- A – Desired Length: Measure from the prominent bone at the back of your neck down to where you want the hem to fall (e.g., mid-calf, ankles).
- B – Sleeve Drop: This determines the length of the rectangular sleeve. Measure from the top of your shoulder down to your desired sleeve hem (e.g., just past the elbow, or to the wrist).
- C – Yuki (Sleeve Span): With your arm held out straight to the side, measure from the center of the back of your neck to your wrist bone. This measurement is crucial for determining the width of the back panel and the sleeves.
- D – Hip Circumference: Measure around the widest part of your hips. Add at least 25 cm (10 inches) for ease of movement and proper overlap.
Once you have your measurements, you can draft the pattern pieces. Use the table below to calculate the dimensions for each piece. A seam allowance of 1.5 cm (5/8 inch) is recommended.
| Piece Name | Quantity to Cut | Dimensions (based on measurements) | Notes |
|---|---|---|---|
| Back Body Panel | 1 (on the fold) | Width: D / 4 + seam allowance. Length: A + hem allowance. | Cut on the fold to create one large back piece. |
| Front Body Panels | 2 (mirror images) | Width: D / 4 + seam allowance. Length: A + hem allowance. | These are two separate pieces for the left and right fronts. |
| Sleeves | 2 | Width: C – (D / 4). Length: (B x 2) + seam allowances. | The length is doubled as it will be folded in half over the shoulder line. |
| Okumi Panels | 2 | Width: 15 cm (6 in). Length: A – (neck opening depth). | These are the narrow front extension panels. |
| Collar (Eri) | 1 | Width: 12 cm (4.75 in). Length: A very long strip. Measure the entire opening from hem, up the front, around the neck, and down the other side. Add extra. | This piece will be folded in half lengthwise to form the collar. |
| Sash (Obi) | 1 | Width: 20 cm (8 in). Length: At least 2.5 meters (2.75 yards). | This will be folded to create a 10 cm (4 in) wide sash. |
4. Cutting and Preparing the Fabric
Preparation is the key to a professional-looking finish. First, pre-wash and dry your fabric according to its care instructions. This prevents any future shrinkage from distorting your finished robe. Press the fabric thoroughly to remove all wrinkles.
Lay your fabric out on a large, flat surface. If your fabric has a directional print or a nap, ensure all pattern pieces are oriented in the same direction. Arrange your drafted pattern pieces onto the fabric efficiently to minimize waste. Pin them securely in place. With sharp fabric scissors or a rotary cutter, carefully cut out all the pieces. Transfer any necessary markings from your pattern to the fabric using a fabric marker or chalk.
5. The Sewing Process: Step-by-Step Assembly
With all your pieces cut, it’s time to begin sewing. Work methodically and press every seam as you go.
Step 1: Construct the Main Body Place the two Front Body Panels on top of the Back Body Panel, right sides together. Pin and sew the shoulder seams. Leave an opening in the center for your neck (approximately 20 cm or 8 inches). Press the shoulder seams open.
Step 2: Attach the Okumi Panels Take one Okumi Panel and align its long edge with the front edge of one of the Front Body Panels, right sides together. Pin and sew from the top down to the hem. Repeat for the other side. These panels create the characteristic front overlap. Press the seams towards the main body.
Step 3: Prepare and Attach the Sleeves Take one Sleeve piece and fold it in half width-wise, right sides together. Sew along the long bottom edge to create a tube, but leave an opening of about 20-25 cm (8-10 inches) for your hand. This seam will run along the bottom of your forearm. Press the seam open. Repeat for the other sleeve.
Now, align the center of the sleeve’s top edge with the shoulder seam of the main body, right sides together. Pin the sleeve to the body’s armhole opening. In traditional kimono, the sleeve is only partially attached to the body, creating an opening under the arm. For simplicity, you can sew the entire armhole seam. For a more authentic look, sew down from the shoulder seam for about 20-25 cm (8-10 inches) on both the front and back, leaving the lower portion open.
Step 4: Sew the Side Seams Lay the robe flat, wrong side out. Align the front and back panels. Pin and sew the side seams, starting from the armpit (or the bottom of your sleeve attachment seam) all the way down to the hem. Press the side seams open.
Step 5: Attach the Collar (Eri) This is the most challenging step, so take your time. Take your long Collar piece and fold it in half lengthwise, wrong sides together, and press firmly to create a center crease. Unfold it. Now, fold the long raw edges in to meet at the center crease and press again. You will have a long strip, four layers thick when folded along the original center line.
Find the center of your collar strip and the center of the back neckline of your robe. Pin the outer raw edge of the collar to the raw edge of the robe’s opening (neckline and down the front panels), right sides together. Sew this first seam carefully, easing the collar around the back neck curve.
Now, fold the collar over the raw edge to the inside of the robe. The pressed-in edge should neatly cover the seam you just sewed. Pin it meticulously in place. For a clean finish, either “stitch in the ditch” from the right side, or hand-sew the folded edge to the inside of the robe using a blind slip stitch.
Step 6: Hemming Try on the robe to check the final length of the hem and the sleeves. Trim if necessary. Create a clean double-fold hem on the bottom of the robe and at the sleeve openings. Fold the raw edge up by about 1 cm (3/8 inch), press, then fold up again by 2-3 cm (about 1 inch), press, and topstitch it in place.
6. Crafting the Obi-Style Sash and Finishing Touches
Your robe is nearly complete. The final piece is the sash. Take your long Sash fabric strip and fold it in half lengthwise, right sides together. Sew along the long edge and one of the short edges, using a 1.5 cm (5/8 inch) seam allowance.
Clip the corners of the sewn end to reduce bulk. Turn the entire tube right side out, using a point turner or a chopstick to help push out the corners cleanly. Press the sash flat, ensuring the seam is straight. Tuck the raw edges of the open end inside and either topstitch it closed or use a hand needle for an invisible slip stitch closure. Give your entire robe and sash one final, thorough press.
Creating your own kimono-style robe is a journey of patience and precision that connects you to a timeless tradition of garment making. Don’t be discouraged by minor imperfections; they are a hallmark of a handmade item and a reminder of the care you invested. As you slip on your finished robe, take pride in the beautiful, functional piece you have constructed with your own hands. Whether worn for quiet moments of relaxation or as a statement of personal style, your DIY kimono robe is a testament to your creativity and skill.


