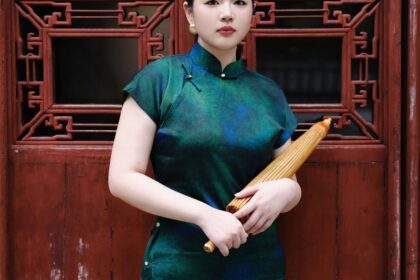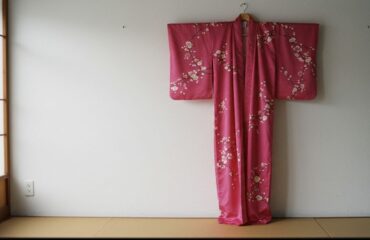
The cheongsam, or qipao, stands as one of the most iconic and enduring garments in the history of fashion. With its elegant, body-hugging silhouette, distinctive mandarin collar, and delicate frog closures, it is a symbol of grace, femininity, and cultural heritage. Originating in the 17th-century Qing Dynasty and later evolving into the modern form we recognize today in the bustling streets of 1920s Shanghai, the cheongsam is a masterpiece of tailoring. Making one is a testament to a sewer’s skill, precision, and patience. While the journey is challenging, it is immensely rewarding, resulting in a bespoke garment that is perfectly tailored to your form. This comprehensive guide will walk you through every stage of the process, from selecting the perfect fabric to sewing the final, delicate stitch, empowering you to create your very own traditional Chinese cheongsam.
1. Gathering Your Tools and Materials
Before you can begin your sartorial journey, you must assemble the necessary equipment and materials. A well-prepared workspace is the foundation of a successful project. The quality of your tools and the suitability of your fabric will significantly impact the final outcome.
Essential Tools and Materials
| Category | Item | Description |
|---|---|---|
| Tools | Sewing Machine | Essential. Requires a regular foot, an invisible zipper foot, and a strong needle suitable for your fabric. |
| Serger (Overlocker) | Optional but highly recommended for professionally finishing raw seams, especially on fray-prone fabrics. | |
| Cutting Tools | Sharp fabric scissors and/or a rotary cutter with a self-healing mat for precise cuts. | |
| Marking Tools | Tailor’s chalk, a fabric marker (disappearing or water-soluble), and a tracing wheel with tracing paper. | |
| Measuring & Drafting | Flexible measuring tape, pattern paper, and rulers (especially a French curve for armholes and neckline). | |
| Pressing Tools | A good steam iron, an ironing board, and a pressing cloth to protect delicate fabrics like silk. | |
| Hand Sewing Supplies | Hand sewing needles, thimble, and pins. | |
| Fabric | Main Fabric | 2-3 meters. Traditional choices include silk brocade, silk satin, or velvet. Cotton and linen work for a more casual look. |
| Lining Fabric | 2-3 meters. Silk habotai, charmeuse, or rayon Bemberg are excellent for a smooth, comfortable interior. | |
| Notions | Interfacing | Lightweight fusible interfacing to add structure to the collar, placket, and cuffs (if any). |
| Closures | One 14-16 inch invisible zipper (side or back) and a set of Pankou (traditional frog closures). | |
| Thread | High-quality all-purpose thread that matches your main fabric and lining. | |
| Bias Tape | Optional, for finishing the inside of the placket. Can be purchased or made from your main fabric. |
2. Taking Accurate Measurements
The hallmark of a cheongsam is its glove-like fit. This is unachievable without precise body measurements. It is best to have someone else take these for you to ensure accuracy. Wear fitted clothing or undergarments while measuring.
Key Body Measurements
| Measurement | How to Take |
|---|---|
| Full Bust | Measure around the fullest part of your chest, keeping the tape parallel to the floor. |
| Waist | Measure around the narrowest part of your torso, typically an inch above the navel. |
| Hips | Measure around the fullest part of your hips and buttocks. |
| Shoulder to Shoulder | Measure across your back from the edge of one shoulder bone to the other. |
| Neck Circumference | Measure loosely around the base of your neck where the collar will sit. |
| Nape to Waist | Measure from the prominent bone at the base of your neck down to your natural waistline. |
| Waist to Hem | Measure from your waistline down to your desired dress length (e.g., knee, mid-calf). |
| Armhole Depth | Measure from the top of your shoulder down to your armpit level. |
| Sleeve Length | (If applicable) Measure from the shoulder point down to your desired sleeve length. |
3. Drafting the Pattern
While commercial patterns are available, drafting your own pattern is the true path to a bespoke cheongsam. This is the most technical step and requires care. For an in-depth visual guide or pre-drafted blocks, resources like Cheongsamology.com offer excellent tutorials and patterns that can simplify this process.
- Draft the Basic Bodice Block: Using your measurements, draft front and back bodice blocks on pattern paper. This block will extend from your shoulders to your hip line. You will create the signature shape using vertical and horizontal guide lines based on your bust, waist, and hip measurements.
- Incorporate Darts: Draw vertical waist darts and angled bust darts on your front and back patterns. These darts are crucial for shaping the fabric to the curves of the body.
- Create the Slanted Placket (Dajin): On the front bodice pattern, draw the iconic asymmetrical opening. It typically starts at the center of the collar, curves down under the right breast, and then continues straight to the side seam. You will need to create two separate front pattern pieces: a full left front and a partial right front, plus a facing piece for the curved opening.
- Draft the Mandarin Collar: The collar is a straight or slightly curved band. Its length should be your neck circumference plus a small overlap for the closure. Its height is typically 1.5 to 2 inches.
- Extend to Skirt: Extend the lines of the bodice block down from the hips to your desired hem length, adding a slight flare for ease of movement.
- Mark the Slits: Decide on the height of your side slits. Mark this point clearly on the side seams of your pattern.
- Add Seam Allowance: Once your pattern pieces are finalized, add a seam allowance (typically 5/8 inch or 1.5 cm) around all edges.
4. Cutting the Fabric
Proper preparation and cutting are non-negotiable for a professional finish.
- Prepare the Fabric: Pre-wash and press your main fabric and lining. This prevents any future shrinkage from ruining the fit of your finished garment.
- Lay Out the Pattern: Lay your fabric on a large, flat surface. Pay close attention to the fabric’s grainline and any directional prints or naps (like on brocade or velvet). All pattern pieces should be aligned with the grainline unless the design specifies otherwise.
- Pin and Cut: Securely pin your paper pattern pieces to the fabric. Use sharp scissors or a rotary cutter for a clean, precise cut. Cut all pieces from your main fabric, lining fabric, and interfacing.
- Transfer Markings: Before unpinning the pattern pieces, carefully transfer all markings—darts, placket lines, dots, and notches—onto the wrong side of your fabric pieces using tailor’s chalk or a fabric marker.
5. Assembling the Cheongsam – The Core Construction
Sew with precision, pressing each seam as you go. This is the secret to a crisp, professional-looking garment.
- Apply Interfacing: Following the manufacturer’s instructions, fuse the interfacing pieces to the wrong side of the collar pieces and the front placket facing.
- Sew the Darts: Stitch all bust and waist darts on both the main fabric and the lining pieces. Press bust darts downwards and waist darts towards the center back or center front.
- Construct the Placket: This is a defining feature. Sew the facing to the right front piece along the curved edge. Clip the curves, turn, and press to create a clean, finished opening.
- Join Shoulder Seams: With right sides together, sew the front and back pieces at the shoulder seams for both the main garment and the lining. Press the seams open.
- Attach the Collar: Sew your two collar pieces right sides together along the top and side edges. Trim the seam, turn it right side out, and press. Baste the raw edge of the finished collar to the neckline of the main garment, carefully aligning the center points. Stitch it securely in place.
6. Adding Sleeves and Finishing the Sides
- Set in Sleeves (if applicable): If your design includes sleeves, sew the sleeve seam first. Then, with right sides together, pin the sleeve into the armhole, easing the sleeve cap to fit smoothly. Stitch in place.
- Install the Zipper: The zipper is typically installed on the right side seam, extending down from the underarm. Pin the side seams right sides together. Sew the seam from the armhole down to the zipper’s starting point, and again from the zipper’s endpoint down to the top of the side slit, leaving a gap for the zipper. Install the invisible zipper into this gap.
- Sew Side Seams: Sew the left side seam completely, from the underarm down to the top of the slit mark. Repeat the entire side seam and zipper process for the lining pieces, but leave a 6-8 inch opening in the left side seam of the lining for turning the dress later.
7. Attaching the Lining and Final Touches
“Bagging” the lining creates a beautiful, clean finish with no exposed seams on the inside.
- Join Lining and Main Fabric: Turn the main dress wrong side out. Keep the lining right side out and place it over the main dress, so the right sides of the lining and main fabric are facing each other.
- Sew and Turn: Align and pin the lining to the main fabric around the entire neckline (this will enclose the raw edge of the collar) and down the front placket opening. Stitch this seam. Carefully turn the entire dress right side out by pulling it through the opening you left in the lining’s side seam.
- Close and Press: Hand-sew the opening in the lining closed using a slip stitch. Press the entire garment meticulously, paying special attention to the edges of the collar and placket.
- Finish Hem and Slits: Turn up the hem allowance on both the main fabric and the lining. The lining hem should be about an inch shorter than the outer hem. Hand-sew the hems using an invisible blind stitch. Finish the side slits by carefully turning the edges inward and hand-stitching them for a clean finish.
- Attach Pankou: Hand-sew your Pankou (frog closures) in their designated places. The first is typically placed at the base of the collar, with the others spaced evenly down the placket. These are both functional and highly decorative.
| Closure Placement | Location |
|---|---|
| Collar Pankou | At the base of the mandarin collar, closing it. |
| Placket Pankou (x2-3) | Spaced evenly along the curve of the placket. |
| Underarm Pankou | Sometimes placed at the end of the placket curve. |
Creating a traditional cheongsam is more than just a sewing project; it is an immersion into a rich history of textile art and culture. It is an exercise in precision, a celebration of the human form, and a commitment to creating something of lasting beauty. The process demands patience, but the result—a stunning, custom-fit garment that you have crafted with your own hands—is a source of immense pride and satisfaction. As you wear your finished piece, you are not just wearing a dress; you are carrying forward a legacy of elegance and craftsmanship for a new generation.


