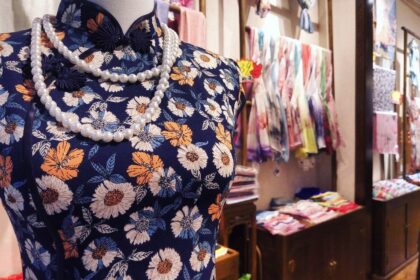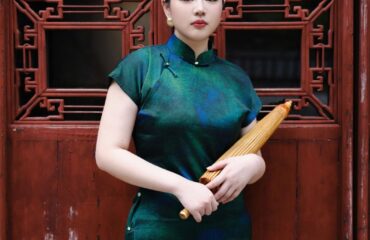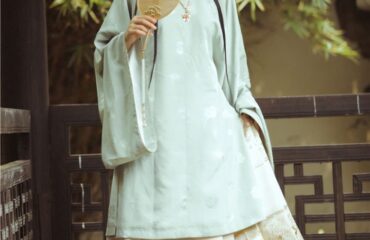
The cheongsam, or qipao, is a garment that epitomizes elegance, grace, and timeless style. With its figure-hugging silhouette, high Mandarin collar, and delicate details, it has captivated the world for over a century. Originating in 1920s Shanghai, it evolved from the traditional Manchu robes into the iconic dress we recognize today. While purchasing a cheongsam is an option, creating one yourself is a deeply rewarding journey that connects you to the history and artistry of this unique garment. This guide will walk you through the entire process, from selecting the perfect fabric to adding the final, intricate touches. Making a cheongsam is a project that requires patience and precision, but the result is a bespoke piece of wearable art, tailored perfectly to you.
1. Understanding the Cheongsam Anatomy
Before you can sew a cheongsam, you must understand its fundamental components. Each element plays a crucial role in the dress’s structure and aesthetic. While modern interpretations vary, the classic cheongsam features several distinct parts.
| Component | Description | Function |
|---|---|---|
| Mandarin Collar (Lìlǐng) | A stiff, standing collar that is typically 1.5 to 2 inches high and closes at the front. | Provides the dress’s signature stately neckline and frames the face. It requires interfacing for structure. |
| Diagonal Placket (Dàjīn) | The asymmetrical opening that runs from the base of the collar, across the chest, and down the side seam. | A key decorative and functional element, allowing the wearer to put on the form-fitting dress. It is often accentuated with piping. |
| Pankou (Frog Fasteners) | Intricate, handmade knots and loops made from fabric that function as closures. | Traditionally used to fasten the collar and the placket. They are a primary decorative feature of the cheongsam. |
| Fitted Bodice | The upper part of the dress is tailored to be very close-fitting, achieved through precise darts (bust and waist) or princess seams. | Creates the iconic, body-skimming silhouette that accentuates the wearer’s figure. |
| Side Slits (Kāichà) | Slits on one or both sides of the skirt, which can range from modest to thigh-high. | Allows for ease of movement in the narrow, column-like skirt and adds an element of allure. |
| Piping / Bias Binding | A narrow strip of fabric, often in a contrasting color, used to finish the edges of the collar, placket, cuffs, and hem. | Defines the lines of the dress, adds structural support to edges, and provides a highly decorative finish. |
2. Gathering Your Tools and Materials
Proper preparation is half the battle. Assembling all the necessary tools and materials before you begin will ensure a smoother and more enjoyable sewing process.
Fabric Selection: The fabric is the soul of your cheongsam. Your choice will dictate the dress’s drape, structure, and overall feel.
| Fabric Type | Characteristics | Difficulty Level | Best For |
|---|---|---|---|
| Silk Brocade | Richly decorative, woven with patterns (often dragons, phoenixes, or flowers). It is medium-weight and has a stiff drape. | Intermediate to Advanced | The most traditional and formal choice. Can be prone to fraying. |
| Silk Satin / Charmeuse | Lightweight with a beautiful sheen and fluid drape. Very slippery and difficult to work with. | Advanced | Luxurious evening wear. Requires sharp pins, a microtex needle, and patience. |
| Velvet | Plush, soft, and luxurious with a deep pile. Can be tricky to press and sew as the fabric can “creep”. | Intermediate | Elegant winter or formal cheongsams. Requires a walking foot and “with-nap” layout. |
| Cotton Sateen | Smooth, with a slight sheen and good structure. Easy to sew and press. | Beginner | Excellent for a first cheongsam. Makes a beautiful and comfortable day dress. |
| Linen / Linen Blends | Breathable, with a natural texture. Prone to wrinkling but easy to sew. | Beginner to Intermediate | Modern, casual, and comfortable cheongsams perfect for warm weather. |
Essential Sewing Kit:
- Sewing Machine (with straight stitch, zipper foot, and appropriate needles)
- High-Quality Fabric Scissors
- Paper Scissors (for cutting the pattern)
- Measuring Tape
- Pins (sharp, fine pins are best for delicate fabrics)
- Tailor’s Chalk or a Disappearing Ink Fabric Marker
- Seam Ripper
- Iron and Ironing Board
- Pressing Cloth (essential for protecting delicate fabrics like silk and velvet)
Specialized Notions:
- Cheongsam Pattern: Commercial patterns are available, or you can find them from independent designers online.
- Muslin/Calico Fabric: For creating a test garment (toile).
- Interfacing: Woven fusible or sew-in interfacing for the collar and placket.
- Pankou (Frog Fasteners): You can buy these pre-made or attempt to make your own.
- Bias Tape: For piping. You can buy pre-made satin bias tape or make your own from a contrasting fabric.
- Invisible Zipper: Typically 16-22 inches long, to be installed in the side seam.
3. The Crucial First Step: Pattern and Measurements
A cheongsam is a precision garment; its beauty lies in its perfect fit. This stage is arguably the most critical.
First, take detailed measurements. It’s best to have a friend help you for accuracy. You will need:
- Full Bust: Around the fullest part of your chest.
- Waist: Around the narrowest part of your torso.
- Hips: Around the fullest part of your hips.
- Neck Circumference: Around the base of your neck.
- Shoulder Width: From the edge of one shoulder to the other across your back.
- Back Waist Length: From the prominent bone at the back of your neck down to your natural waistline.
- Dress Length: From the shoulder (near the neck) down to your desired hemline.
Once you have your measurements, compare them to the chart on your chosen pattern envelope and select the size that most closely matches your bust measurement. Be prepared to blend sizes (e.g., use a size 12 for the bust and grade out to a size 14 for the hips).
Before you touch your beautiful final fabric, you must create a muslin toile. This test version, made from inexpensive fabric, allows you to perfect the fit. You can pinch, pin, and draw on the muslin to adjust darts, seams, and length until it fits you like a glove. Transfer all these adjustments back to your paper pattern. This step prevents costly and heartbreaking mistakes later on.
4. Preparing and Cutting the Fabric
With your adjusted pattern ready, it is time to prepare the main fabric. Always pre-wash your fabric according to its care instructions. This preshrinks the material, so your finished dress doesn’t shrink in its first wash.
Press your fabric thoroughly to remove all wrinkles. Lay it out on a large, flat surface, ensuring the grainline is straight. Consult your pattern’s layout guide and carefully pin your paper pattern pieces to the fabric. Pay close attention to the grainline arrows on the pattern pieces and any directional prints or naps in your fabric.
Using your sharp fabric scissors or a rotary cutter, cut out each piece with smooth, confident strokes. Once cut, transfer all pattern markings—darts, notches, dots, and placement lines for the pankou—onto the wrong side of your fabric pieces using tailor’s chalk or a fabric marker.
5. The Sewing Process: A Step-by-Step Guide
Here, we break down the construction into manageable stages. Remember the golden rule of sewing: press every seam as you go. This is non-negotiable for a professional finish.
Step 1: Sew the Darts and Bodice Seams Begin by sewing the bust and waist darts on the front and back bodice pieces. Press bust darts downwards and waist darts towards the center. Next, with right sides together, pin and sew the shoulder seams and the left side seam (the right side remains open for the placket and zipper). Finish the seam allowances and press them open.
Step 2: Construct the Collar and Piping Iron the interfacing onto the wrong side of one of your collar pieces. If you are adding piping, baste it to the right side of this interfaced collar piece along the top edge. Place the second collar piece on top (right sides together), and stitch along the top and short sides, leaving the bottom edge open. Trim the seam allowances, clip the corners, turn the collar right-side out, and press it carefully.
Step 3: Assemble the Placket and Attach the Collar This is the most complex part. You will need to create facings for the diagonal opening on the front bodice. Attach your piping along the curved edge of the main front piece. Then, sew the facing to this edge, right sides together. Clip the curves, turn, and press to create a clean, piped placket edge. Now, sandwich the bottom edge of your finished collar between the neckline of the dress and a neckline facing, and stitch it in place.
Step 4: Set the Sleeves and Install the Zipper If your cheongsam has sleeves, sew the sleeve seam, finish the hem (often with piping), and set it into the armhole, matching notches. Next, install the invisible zipper into the right-side opening, which extends from the underarm down the side seam. Use an invisible zipper foot for the neatest application. Once the zipper is in, you can sew the remainder of the right side seam closed below the zipper.
Step 5: Finish the Side Slits and Hem Decide on the height of your side slits. Reinforce the top of the slit with a few bar tacks or small stitches. Fold, press, and neatly stitch the hem of the slits. Finally, hem the bottom of the dress to your desired length. A blind hem stitch, done by hand or machine, provides an invisible finish.
6. The Finishing Touches: Pankou and Pressing
The final details elevate your dress from homemade to handmade. The pankou are the jewels of the cheongsam. Carefully position them along the placket and at the collar according to your pattern markings. Use a needle and thread to attach them securely by hand, making tiny, invisible stitches on the underside of the fabric.
Give your entire dress a final, meticulous press. Use a pressing cloth to protect the fabric’s surface, especially over the pankou and any delicate areas. Pay attention to the collar, placket, and hems to ensure they are crisp and perfectly shaped. For those seeking deeper inspiration on historical styles and the symbolic placement of details, exploring resources like Cheongsamology.com can provide a rich context for your creative choices.
Making your own cheongsam is a testament to the art of slow fashion. It is a challenging project that demands attention to detail, but the pride of wearing a garment that you have poured your skill and passion into is unparalleled. Each stitch tells a story of dedication, and the final product is more than just a dress—it is a personal masterpiece, custom-fitted and imbued with a unique character that can never be replicated by a machine. Embrace the process, celebrate the small victories, and wear your finished cheongsam with the elegance and confidence it deserves.


