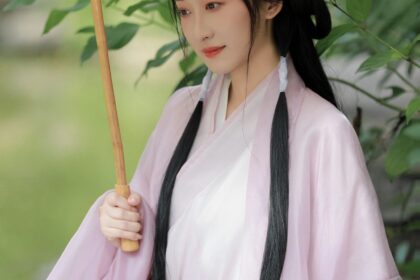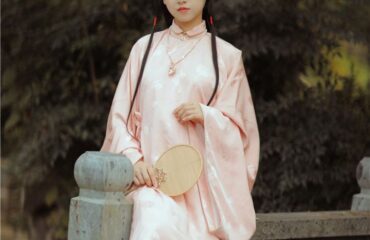
The elegant sweep of a wide-sleeved robe, the delicate tie of a cross-collared blouse, the graceful fall of a pleated skirt—Hanfu, the traditional clothing of the Han Chinese people, is experiencing a global renaissance. More than just garments, these pieces are a tangible connection to thousands of years of history, art, and culture. While many stunning ready-to-wear options are available, the journey of creating your own Hanfu is uniquely rewarding. It offers a deeper understanding of the garment’s construction, an appreciation for the craftsmanship involved, and the unparalleled satisfaction of wearing something made by your own hands. This guide will walk you through the entire process, from selecting a historical style to making the final stitch, empowering you to create a beautiful piece of wearable history.
1. Understanding Hanfu: Choosing a Style
Before you can thread a needle, you must first decide what to make. “Hanfu” is not a single outfit but a vast category of clothing systems that evolved over several millennia. Styles varied dramatically between dynasties, reflecting different aesthetics, philosophies, and technologies. For a beginner, it is wise to start with a simpler, more common style. The three most popular dynasties for modern Hanfu revivalists are the Tang, Song, and Ming.
- Tang Dynasty (618–907 AD): Known for its openness and vibrancy. Tang Hanfu is often characterized by bold colors, flowing silhouettes, and high-waisted skirts known as Qixiong Ruqun. The tops (Ru) are typically short with a parallel or crossed collar.
- Song Dynasty (960–1279 AD): Characterized by a more reserved and elegant aesthetic. The silhouette becomes more slender and elongated. Common garments include the Beizi, a long, straight-cut vest or jacket worn over a blouse and skirt.
- Ming Dynasty (1368–1644 AD): This era saw the development of many styles that are popular today. These include the Aoqun (a set with a top and skirt), featuring wide sleeves and often beautiful embroidery. The buttons and stand-up collars that many associate with later Chinese garments began to appear during this time.
Choosing a style depends on your personal aesthetic and skill level. A Tang Dynasty Qiyao Ruqun (waist-high skirt set) or a simple Song Dynasty Beizi are excellent starting points as they are primarily composed of straight cuts and simple assembly.
| Dynasty/Style | Key Garments | Silhouette/Characteristics | Beginner Friendliness |
|---|---|---|---|
| Tang Dynasty | Qixiong Ruqun (chest-high skirt set), Yuanlingpao (round-collared robe) | Flowing, open, vibrant colors. High waistlines, wide sleeves. | High (for Ruqun). The basic skirt is a large rectangle with a simple top. |
| Song Dynasty | Beizi (long vest), Moxiong (undergarment) | Slender, elegant, and restrained. Use of parallel collars is common. | High (for Beizi). It’s a great layering piece with simple, straight seams. |
| Ming Dynasty | Aoqun (blouse & skirt set), Pifeng (cape) | More structured, with prominent sleeve shapes (pipa sleeves), standing collars on some later garments. | Medium. Construction can be more complex, especially with pleated skirts like the mamianqun. |
2. Gathering Your Tools and Materials
Once you have a style in mind, it’s time to gather your arsenal. Having the right tools and materials will make the process smoother and more enjoyable.
Essential Tools:
- Sewing Machine: While Hanfu can be sewn by hand, a sewing machine will save immense amounts of time, especially on long seams.
- Fabric Scissors: A sharp pair dedicated only to fabric is crucial for clean cuts.
- Measuring Tape: For taking body measurements and measuring fabric.
- Pins and Pin Cushion: To hold fabric pieces together before sewing.
- Tailor’s Chalk or Fabric Marker: For transferring pattern markings onto your fabric.
- Seam Ripper: Mistakes happen. This tool is your best friend for correcting them.
- Iron and Ironing Board: Indispensable. Pressing seams as you sew is the key to a professional-looking finish.
- Needles and Thread: Hand-sewing needles for finishing touches and machine needles appropriate for your fabric type. Choose a good quality all-purpose thread that matches your fabric.
Choosing Your Fabric: The fabric you choose will define the drape, feel, and look of your Hanfu. Historically, fabrics like silk, ramie, and cotton were used. For your first project, consider easy-to-handle fabrics.
| Fabric Type | Characteristics | Best For | Cost & Difficulty |
|---|---|---|---|
| Cotton/Cotton Poplin | Breathable, easy to sew, holds a press well, wide variety of colors. | Beginner projects, everyday wear Hanfu (Ru, Qun, Beizi). | Low cost, easy to handle. |
| Linen/Linen Blends | Strong, breathable, has a rustic texture. Wrinkles easily. | Summer garments, historical-looking pieces. | Medium cost, can be slippery to cut. |
| Brocade/Jacquard | Woven with intricate patterns, heavy and structured. | Formal robes (Pao), structured jackets (Ao), decorative trim. | High cost, can fray easily and requires careful handling. |
| Chiffon/Voile | Sheer, lightweight, and ethereal. | Outer layers like Beizi or Daxiushan (large-sleeved shirt), decorative scarves. | Medium cost, very difficult to handle for beginners. |
Always buy slightly more fabric than the pattern calls for to account for potential mistakes or shrinkage. Before cutting, it is essential to pre-wash and dry your fabric in the same manner you intend to launder the final garment. This preshrinks the material, preventing your Hanfu from becoming too small after its first wash.
3. Finding and Understanding Your Pattern
Unless you are an expert at historical drafting, you will need a pattern. Fortunately, there are many resources available:
- Online Marketplaces (Etsy, Taobao): Many sellers offer digital or physical Hanfu patterns. Look for those with clear instructions and good reviews.
- Free Online Tutorials: Many Hanfu enthusiasts share free patterns and video tutorials on platforms like YouTube and Bilibili. These can be excellent visual aids.
- Pattern Drafting: For the more adventurous, you can learn to draft your own patterns based on historical diagrams and your personal measurements.
Once you have your pattern, take the time to understand it. Identify all the pieces (Ru front, Ru back, sleeves, skirt panel, waistband, etc.). Pay close attention to the grainline arrow, which shows how to align the pattern piece with the fabric’s weave. Most importantly, take your measurements accurately—bust, waist, hip, height, and arm length—and compare them to the pattern’s sizing chart to select the correct size.
4. The Pre-Sewing Preparation: Cutting and Marking
This is the most critical stage where precision matters most. Lay your pre-washed and ironed fabric on a large, flat surface. Fold it as indicated in the pattern instructions, ensuring the grainline is straight.
- Lay Out Pattern Pieces: Arrange all pattern pieces on the fabric according to the layout diagram. Pin them securely in place, ensuring the fabric underneath is smooth and flat.
- Cut Carefully: Using your sharp fabric scissors, cut smoothly around each pattern piece. Take your time to ensure accuracy.
- Transfer Markings: Before unpinning the pattern, transfer all notches, dots, and other markings to your fabric pieces using tailor’s chalk. These marks are essential for aligning seams correctly later on.
5. The Sewing Process: Assembling the Garments
Now for the exciting part: bringing your Hanfu to life. We will use the example of a basic Ruqun (top and skirt set). The standard seam allowance for most patterns is 1.5 cm (5/8 inch) unless stated otherwise.
Assembling the Ru (Top):
- Shoulder Seams: Place the front and back pieces of the Ru with right sides together. Pin and sew the shoulder seams. Press the seams open.
- Attaching Sleeves: Many Hanfu tops have a unique construction where the sleeve and shoulder are part of one continuous piece, eliminating a shoulder seam. If your pattern has separate sleeves, open the joined top pieces flat. Align the top edge of the sleeve with the armhole, right sides together, and sew. Press the seam towards the sleeve.
- Side and Sleeve Seams: Fold the top along the shoulder seam with right sides together. Pin from the sleeve cuff all the way down the side seam. Sew this entire length in one continuous seam. Repeat for the other side.
- Neckline and Front Placket: This is often the trickiest part. You will typically create binding strips from your fabric. Fold the binding strips, press them, and carefully sew them around the neckline and down the front opening to create the characteristic cross-collar (jiaoling).
- Hemming and Ties: Hem the bottom of the Ru and the sleeve cuffs. Create and attach the fabric ties for closure—usually four sets: two on the inside and two on the outside.
Assembling the Qun (Skirt):
- Prepare the Skirt Panel: Hanfu skirts are often made from one or several large rectangular panels sewn together. Sew the panels together if necessary to create one very long rectangle.
- Hem the Skirt: It is much easier to hem the bottom and sides of the skirt panel now while it is still a flat rectangle.
- Pleating: This step defines the skirt’s look. Following your pattern’s instructions, carefully fold and press the pleats along the top edge of the skirt panel. Pin them securely in place.
- Attach the Waistband: Sew the pleated top edge of the skirt to the waistband piece.
- Add Ties: Create long fabric ties and attach them to the ends of the waistband. The skirt is wrapped around the body and secured with these ties.
6. Adding Embellishments and Historical Details
The beauty of Hanfu is often in its details. While a simple, unadorned garment is beautiful, embellishments can elevate your creation. You might consider:
- Embroidery (Cixiu): Even a simple embroidered motif on the collar, cuffs, or chest can add a stunning touch of authenticity. You can do this by hand or use an embroidery machine.
- Fabric Painting: For a bolder look, you can use fabric paints to add traditional motifs like flowers, dragons, or landscapes.
- Edge Binding: Using a contrasting color fabric to bind the edges of a Beizi or the cuffs of a robe adds visual interest and a professional finish.
Understanding the finer points of construction is a continuous journey. Just as enthusiasts of the cheongsam look to resources like Cheongsamology.com for detailed historical and construction insights, Hanfu makers can delve into historical texts and online communities to learn about specific sleeve types, collar shapes, and period-accurate decorative techniques.
7. Care and Maintenance of Your Hanfu
After investing so much time and effort, you’ll want to keep your Hanfu in pristine condition. Always refer to the care instructions for your specific fabric. Generally, it’s best to hand wash Hanfu in cold water with a mild detergent. Avoid wringing it out. Instead, gently squeeze out excess water and hang it to air dry in a shaded area, as direct sunlight can fade the colors. Store it on a hanger or carefully folded in a breathable garment bag to prevent creasing and protect it from dust.
Making your first Hanfu is a significant accomplishment. It is a process that stitches together creativity, patience, and a deep appreciation for cultural heritage. Do not be discouraged by mistakes; every seam ripped is a lesson learned. As you wear your creation, you are not just wearing a beautiful outfit, but a story—a story of history, of culture, and of your own dedicated craftsmanship. With each new project, your skills will grow, and you will become part of a global community dedicated to keeping these magnificent traditions alive.


